8 Tips For Refinishing Home Kitchen Cabinets To Make Your Kitchen Look Like New
Introduction to Refinishing Home Kitchen Cabinets
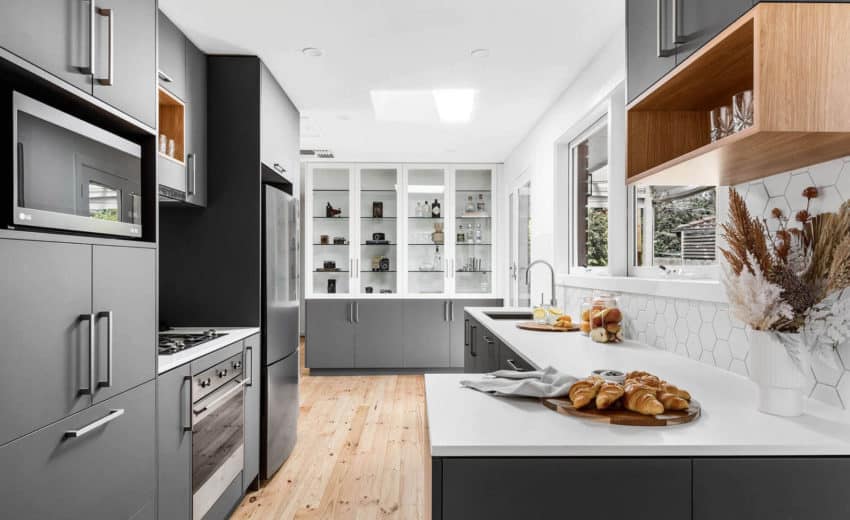
Are you feeling like your kitchen is in need of a facelift? Refinishing home kitchen cabinets is one of the most cost-effective and rewarding ways to give your kitchen an update. Read on for 10 tips to help you refinish your cabinets and make your kitchen look like new again!
1. Cleaning and Preparing the Surface
Cleaning and preparing the surface is the most important step in refinishing home kitchen cabinets. If the surface is not clean, the new finish will not adhere properly and will not last as long. To clean the surface, first remove all hardware from the cabinets. Then, using a mild soap and water solution, scrub all surfaces of the cabinets thoroughly. Rinse with clean water and dry completely with a soft cloth.
2. Sanding and Stripping
If your cabinets are in good shape but could use a facelift, sanding and stripping is the way to go. You’ll want to sand down the cabinet doors, drawer fronts, and frames to remove any existing paint or stain. If there are any areas that are particularly damaged or worn, you may want to use a power sander to make the job go faster. Once everything is sanded smooth, you can start stripping off the old finish. This can be done with a chemical stripper or by sanding with very fine grit sandpaper. Once the old finish is removed, you can start applying a new finish.
3. Applying Primer
Once the sanding is complete, it’s time to apply primer. This will help the paint to better adhere to the surface of the cabinets and provide a more uniform appearance. When choosing a primer, be sure to select one that is designed for use on laminate surfaces. Apply the primer with a brush or roller, following the manufacturer’s instructions. Once the primer is dry, you’re ready to start painting!
4. Painting
Once you have sanded and cleaned your cabinets, it’s time to start painting! Here are a few tips to help you get started:
- Choose a high-quality paint. This will make a big difference in the final result.
- Use a primer. This will help the paint adhere better to the surface and also provide a nice base for the topcoat.
- Use a brush or roller specifically designed for painting cabinets. These usually have shorter bristles or naps which will help prevent streaking.
- Start with the doors and drawers first. This way you can paint them separately from the main cabinet boxes if needed.
- Apply paint in thin, even coats. It’s better to do multiple thin coats than one thick coat. Allow each coat to dry completely before adding another.
5. Sealing and Protecting Your Cabinets
After you have sanded, stained, and sealed your cabinets, you will want to protect them from future damage. You can do this by adding a few coats of polyurethane or varnish to the surface. This will create a barrier between your cabinets and the elements, making them more resistant to scratches, stains, and water damage.
6. Replacing or Upgrading Hardware
If your kitchen cabinets are looking a little worse for wear, don’t despair—a little elbow grease and some strategic upgrades can go a long way. First, remove all the hardware from your cabinets. This includes hinges, knobs, and pulls. Next, give the cabinets a good cleaning with soap and water or a degreaser. If the cabinets are extremely dirty or greasy, you may need to use a stronger cleanser like trisodium phosphate.
7. Refinishing Existing Hardware
If your kitchen cabinets are looking a little dated, one way to give them a fresh new look is to refinish the hardware. To start, remove all of the hardware from the cabinets—knobs, pulls, and hinges. Clean them thoroughly with soapy water and a soft cloth. Next, sand down the hardware to remove any existing paint or finish. If there is any rust, use a wire brush to remove it before sanding. Choose your new finish and apply it evenly across the surface of the cabinet doors and drawer fronts. Finally, reattach all the hardware, ensuring a polished finish.
8. Adding New Decorative Elements
When refinishing home kitchen cabinets, adding new decorative elements can refresh the look of your kitchen. Consider adding new hardware, painting or staining the cabinets, or adding decals or molding for a unique touch.
Conclusion
Refinishing home kitchen cabinets can breathe new life into your kitchen without breaking the bank. By following these 10 tips, you can achieve a professional-looking finish and enjoy a kitchen that feels like new again.
Choose AMD Construction & Remodeling
FAQs
- Can I refinish my cabinets myself, or should I hire a professional?
- Refinishing home kitchen cabinets can be a DIY project, but it requires careful preparation and attention to detail. If you’re comfortable with tasks like sanding, painting, and sealing, you can tackle it yourself. However, if you’re unsure or want a flawless finish, hiring a professional might be a better option.
- How long does it take to refinish kitchen cabinets?
- The time it takes to refinish kitchen cabinets depends on several factors, including the size of your kitchen, the condition of the cabinets, and the complexity of the refinishing process. Generally, it can take anywhere from a few days to a couple of weeks to complete the project.
- What type of paint should I use for refinishing home kitchen cabinets?
- For refinishing cabinets, it’s best to use a high-quality paint specifically designed for kitchen cabinets. Look for paints labeled as “cabinet paint” or “trim paint,” as these are formulated to withstand the wear and tear of kitchen use and provide a durable finish.
- Do I need to sand my cabinets before refinishing them?
- Yes, sanding is an essential step in the refinishing process. Sanding helps to smooth out imperfections, remove old finishes, and create a surface that the new paint or stain can adhere to properly. It also ensures a professional-looking finish.
- How much does it cost to refinish kitchen cabinets?
- The cost of refinishing home kitchen cabinets can vary depending on factors such as the size of your kitchen, the condition of the cabinets, and the materials and finishes you choose. On average, homeowners can expect to spend anywhere from a few hundred to a few thousand dollars for a DIY project. Hiring a professional may cost more but can ensure a high-quality finish.